
Now, I started writing this post on Friday, when it was supposed to go live. But I got busy doing other things, and then worked the Crop, so I never finished it. So just pretend that it is Friday and you are reading this. You've just come home from work, or you're still there, stealing time. You find you need a little creative inspiration at the end of this long work week, and since you have a little time to craft and create tonight, you are hoping for a genius plan. And here goes...
I really had no plans for my Friday DIY today. None at all. And sitting at work wasn't helping my creative energy at all. And my Kingston doesn't work in the computer up front here, so I have not been stealing web-images for inspiration later. side note: I am thinking of a painting of a purple lady named Kingston. she is already very edgy. also, I started another painting the other day to try some things out for a potential TM class, and it's coming along very slowly. I have already lost my love for my ladies. They are becoming difficult for me to "complete", but it is also difficult to take them in another direction. oh my.
and then this little aside has given me an idea. a mini painting tutorial/workshop. this will be very very basic. and please don't fault me for my non-use of proper art terminology! I want to show you now how to do up a little painty-arty self-portrait!! ooh la la!
next week, I'm thinking art journal DIY. I made that lovely messy one for TM class purposes and it really put me in the mood to do more of my own. but I never got around to it. Elsie and Rachel are teaching an art journal class, that I would take had my budget allowed for it. but it doesn't. so i will continue to be self-taught! okay, now I must shut up and get on with the post gosh darnit!
You will need:
- canvas, cardboard, wood, whatever you want to build your portrait on
- a pencil or white chalk
- your media of choice: paint and paintbrushes, pastels, pencil crayons, crayon crayons, paper collage, whatever!
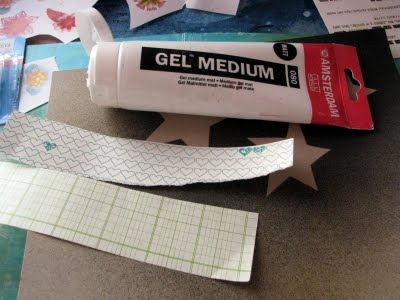
- gel medium, decoupage glue, white glue, pvc glue, etc. (we're looking for some sort of clear liquid glue goodness)
- other ephemera and embellishments
Step One: If you are working on an unfinished background, you should prime it first. I like to use Gesso, which is an artist's primer, but use whatever you have. Any old white paint should work, but depending on your surface you might need a couple of coats.
Step Two: I always like to start with building a background. With collaged papers, or just paint and texture (like stamps or whatever). This way you can avoid some of the issues you might feel with a blank canvas! It can be very intimidating just putting something down to start. This takes away some of this foreboding.


Step Three: Plan out the layout of your portrait. Are you doing a whole body shot (he he...body shot) or just a head and shoulders thing (he he...head and shoulders)? Profile, face, back of your head, whatever. Now sketch it out...roughly. If you have built a dark background for yourself, you will want to use some white chalk, or fabric marker stuff. Otherwise a pencil will work fine.

Step Four: Using your gesso, or some white paint, cover the area where your face, neck and hands are. This way it makes it easier to build the details later. Depending on how dark or patterned your background is, you might need to add a couple of coats. Alternately, you can let some of your background show through for a super cool effect!


Step Five: Once the white has dried, you can paint the first colour. Pick a colour that's close to your skin tone and cover the white areas. I'm using a beige-y colour for all three of us. Don't worry about following the lines too much right now...I have a quick fix for that at the end!

Step Six: I like to use watercolour pencils for the details on any faces I paint...I find I am better with a pencil than a small brush! Here's a little FYI: the Dollarama paint provides a perfect matte finish to draw on! You can even use regular pencil crayons, blended with some water, for a great effect! And you don't need to have any painting skills!

If you're really not confident in your drawing skills, print a photo of yourself onto cardstock, mount the cardstock on to your background and accentuate some features with paint or pencils.
Step Eight: Fixing boo-boos. If you find that you messed up on one feature or another, remember that paint is very forgiving! Just go back over the area using your skin colour and try again. Or you could cover it up with a collaged element, like I did with Lucas' hair here.


I planned on putting this in a frame I already had on hand. And it has glass in it, so I didn't want any element to be 3D. So I am using paper and doodles as embellishments. If you are painting on a canvas, by all means add some 3D ephemera, if that's what floats your boat.
Step Nine: As a finishing touch, I outlined everything with a black Sharpie! It defines all the edges, covers any mistakes there, and makes everything look a little more like a doodle, than a fancy piece of art! This is by no means a completely accurate portrait and I didn't want it to be!

Sign your portrait and hang it up! You're done!!

Thanks for being so patient with me...I feel bad because I am doing this post while Russ has been busy doing laundry, dishes, more laundry, vacuuming, etc. Heck...I worked out this morning, so already my day has been a successful one!
My call to the TM girls for more Technique layouts was also successful!! Check out the TNT Blog this week for more "make your own flower" examples and lots of gorgeous-ness! I have no clue what the next Technique is going to be, but this gives me some stalling time!
Later skater alligator.
OK, I"m up for this. Tonight I gesso, tomorrow, the background!
ReplyDelete