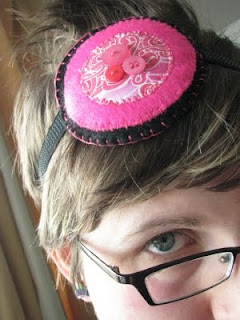
Here is my latest DIY project. It is also something that you can wear...or you can add the "Penny" to jazz up a t-shirt, scrapbooking layout or mini album.
I made this head band for a lady at work...to match her hot pink scrubs! But I also made one for Kara with greens, blues and browns, which I consider Kara colours for some reason...
I was inspired by this listing I found on Etsy. It's called a "Traditional Penny Rug"...
And I thought: "how fun would those circles be on a head band..." and the rest is history!
You will need:
- a circle template (I use whatever I have kicking around that's the right size...you'll see!)
- felt and fabric in coordinating colours
- headband (see my note below)
- buttons, etc. to embellish
- coordinating embroidery floss - or any thread - and needle
- thin cotton batting...you can buy this by the metre at any fabric shop
Step One:
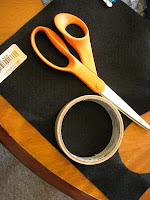
Find some circle "templates" that are varying sizes and nest well together. I often use lids, or a roll of masking tape, or coasters, or whatever you have on hand.
Using the largest circle template (about 3 inches wide), trace it onto a piece of solid felt. Cut it out.
Now using the piece you just cut out, trace and cut out another piece of the same solid felt. Also, using the first piece you cut, cut a slightly smaller piece out of a different colour of felt. Set these aside.
Step Two:
Using the next size down of your circle template, trace it onto your patterned fabric. It can be whatever type of fabric you have around...mine is a simple cotton broadcloth.
Now cut it out.
Step three:
Sew your patterned fabric piece onto the smaller of the solid felt pieces, the one that doesn't have a buddy. Use whatever kind of stitch you like, but remember you will only see it on the one side, so it doesn't matter how "pretty" it is on the back!
Next, sew this piece on to one of the larger pieces of felt. You can use the same stitch as in the step above.
Step Four:
Choose your buttons or other embellishments and sew them onto the piece you just finished sewing together (fabric - felt - felt)
Step Five:
Take the second piece of solid felt and using it as a guide, but a piece of thin cotton batting about a quarter inch smaller in diameter.
Step Six:
This part gets a little difficult because we are going to sew all the layers together. Line up the single piece of solid felt to the batting and the fabric-felt-felt piece. I use a blanket stitch for edges like this because it looks good on all sides. And it's super easy! If you can, try to get your stitches through the batting as well.
Once you get about halfway around STOP and insert your headband in between the bottom & top layers of felt. And make sure the batting is above the headband.
NOTE ABOUT HEADBANDS:
For the pink one I used a fabric no-slip one that I bought at Superstore. You can buy them at any drug store or grocery store in a variety of colours and widths. I chose this one because Randa says she has a funny shaped head and these are the only headbands that stay put! And they are actually really comfy, so I just might keep using them! Another bonus is that because they are fabric, you can stitch right through them. Unlike the hard plastic kind which you have to get creative to stitch the penny to the headband. I used the hard plastic kind for the blue one in the demo. It's really hard to stitch around, but it still looks good.
If you are using a fabric headband, use a normal stitch right across where the headband and penny meet. Go over your stitches a couple of times in order to get the best hold. Then continue with the blanket stitch until you come to the other side and stitch the headband to the penny again.
If you are using a hard plastic kind, you will have to stitch right along the edges really tight. Also, try to loop your thread around the headband, hiding the stitch underneath the felt. Try a bunch of different ways...just make sure it's tight!
That is all!
These guys are so fun and fabulous! And they don't take very long at all, once you get all your supplies together. They are my new favourite go-to craft...we'll see how long this lasts!
Thanks for stopping by...now I need a nap...
Thanks for stopping by...now I need a nap...


Enjoy your nap, girlfriend, you earned it! These are really pretty!
ReplyDelete